This tutorial shows how to use a China-model iPhone, a 163 email and a mainland China phone number to create a US-region Apple Account (formerly Apple ID) entirely on your iPhone. Apple’s official iPhone sign-up flow involves choosing a country or region, entering an email and password, and verifying your email and phone as prompted; users in mainland China may need to provide a +86 number. The official steps do not list a US IP address as a prerequisite. What you see may vary with account status and iOS version.Apple’s official guide to creating an account
1. Before You Start
✅ A China-model iPhone with internet access that can open the App Store normally.
✅ A 163 email address you can use, that is not yet registered as an Apple Account and can receive mail.
✅ A mainland China phone number (+86) of your own that can receive texts or calls.
✅ Your real personal details and a password that meets the requirements. Do not use a fake identity, someone else’s number or a made-up billing address.
2. Create a US Account on Your iPhone
The following 9 screenshots come from public tutorials on the web (source under each image); some show older iOS versions or the web sign-up page, and personal details are masked; actual button names, page order and options may vary with iOS version and account status.
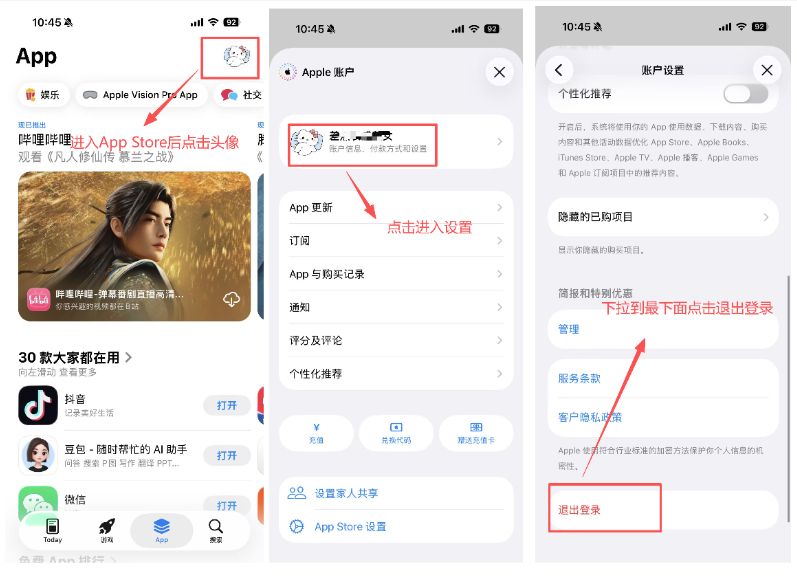
Open App Store and tap your profile picture in the top-right corner. If you are signed in to another account, just sign out of Media & Purchases in the App Store — there is no need to sign out of iCloud.
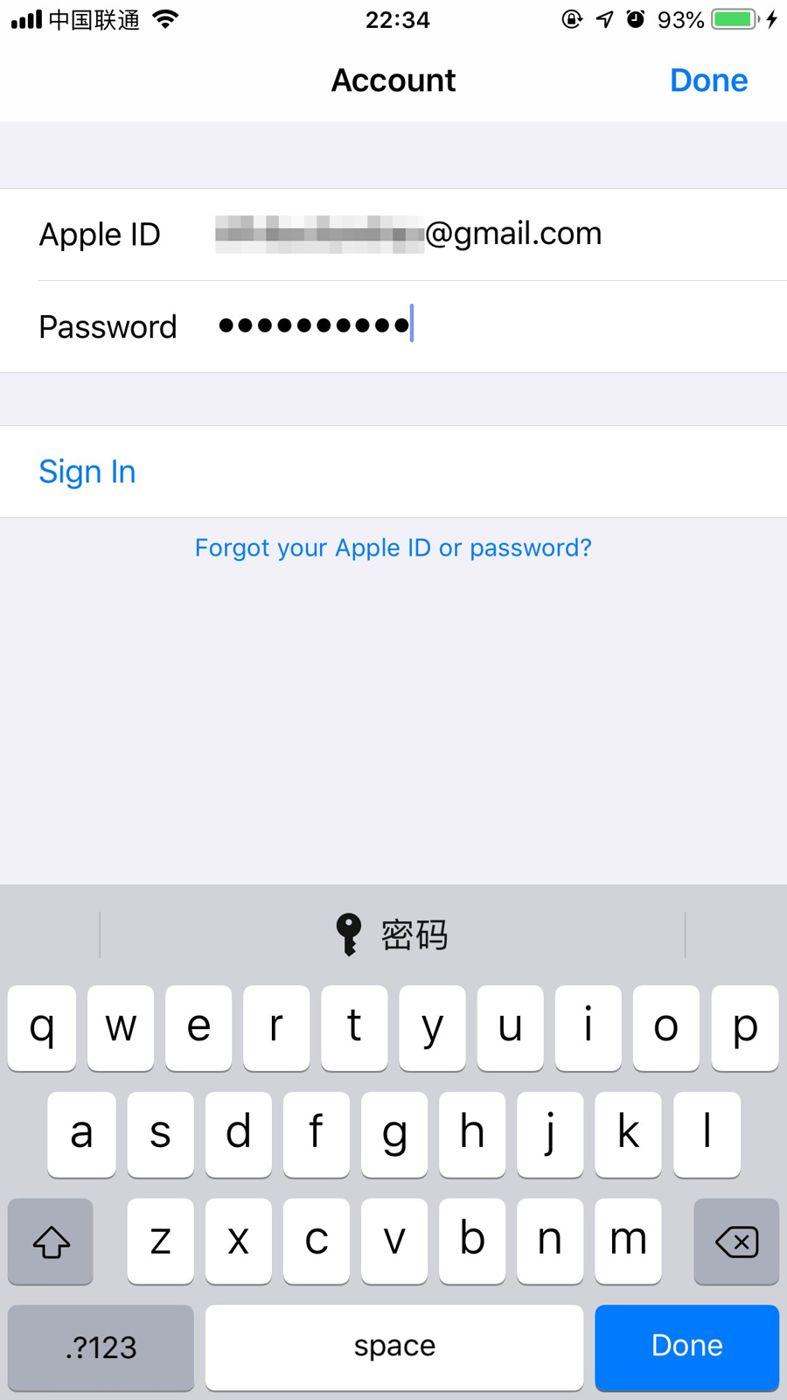
On the account page, choose Create New Apple Account. If this option is missing, check that you have signed out of Media & Purchases in the App Store and follow Apple’s official help page — don’t rush to sign out of iCloud because of this.
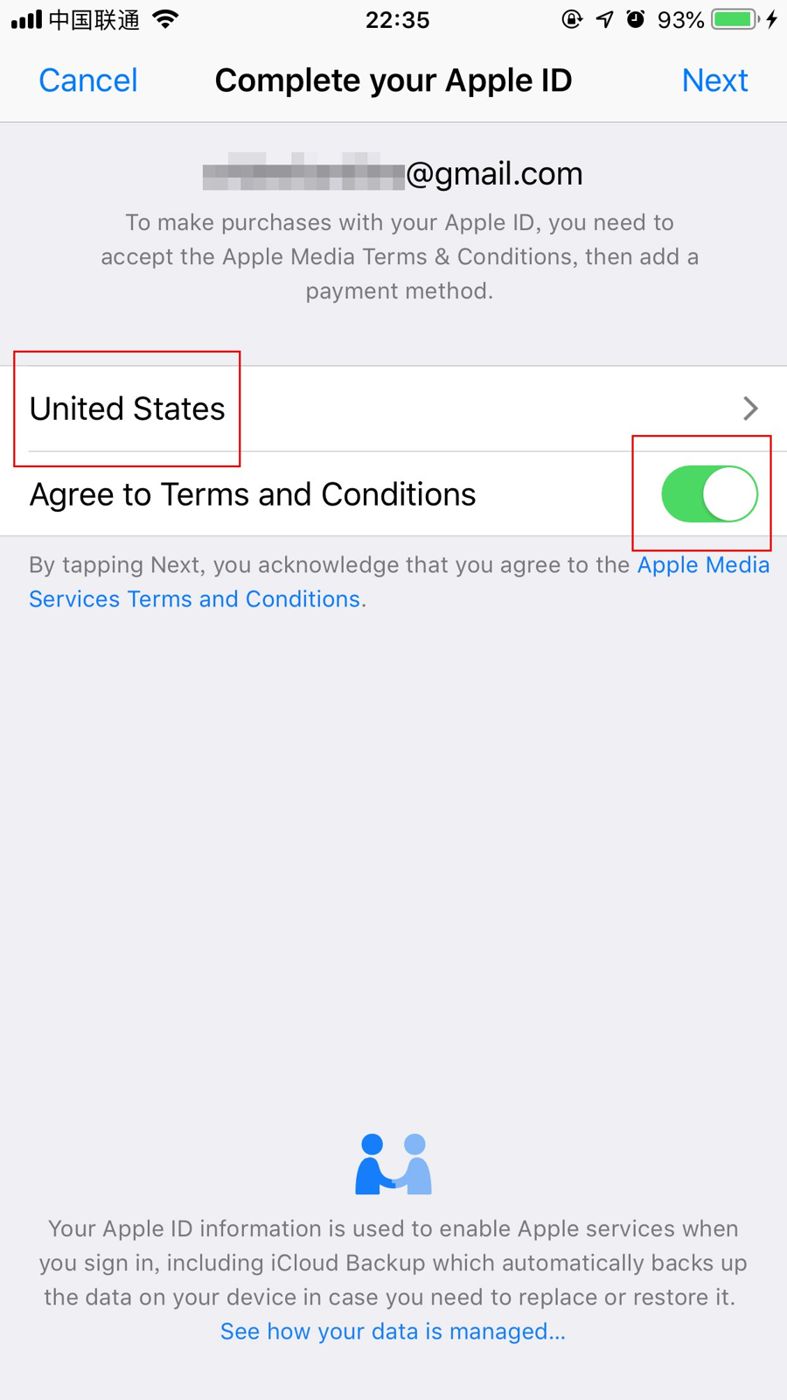
For Country or Region, choose United States, then review and agree to the terms Apple shows.
Enter your name and date of birth, put your own 163 email in the email field, and set a password as required. This email will be your account sign-in, so make sure it stays usable long-term.
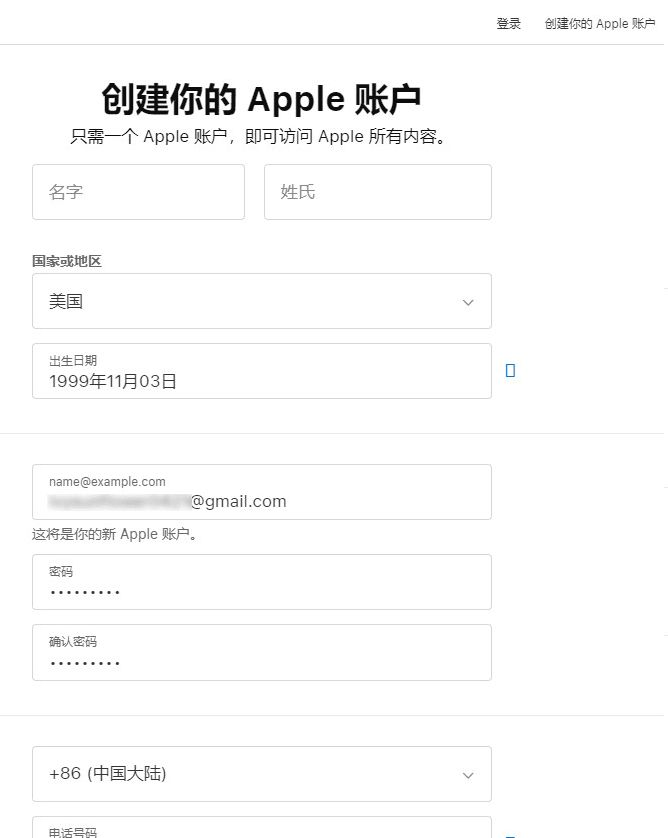
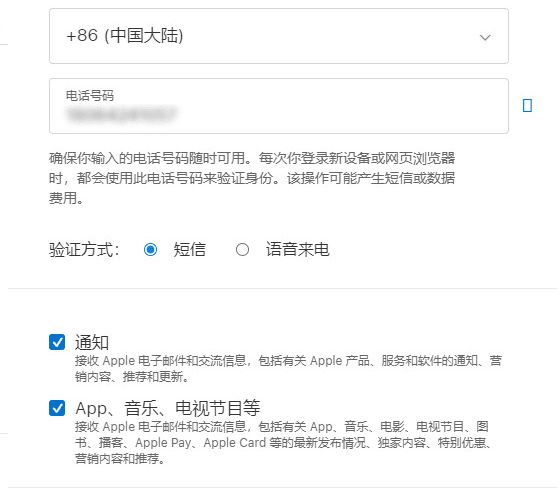
Enter your mainland China phone number as required, with country code +86, and choose to receive the code by text or call.
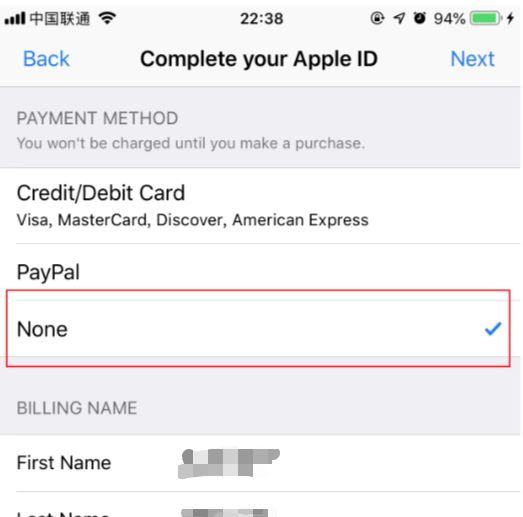
Go to the payment page. If None is offered, you may choose it if appropriate; this option is not guaranteed to appear. If another payment method is required, provide valid details as instructed — do not use fake information to get around verification.
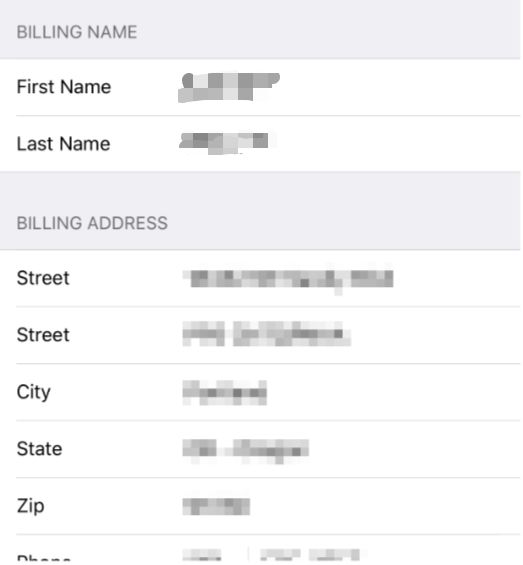
If a billing address is required, only enter real, valid details you are entitled to use. Don’t copy sample addresses from the internet; if you don’t have qualifying details, stop and check Apple’s notes on account region and payment details.
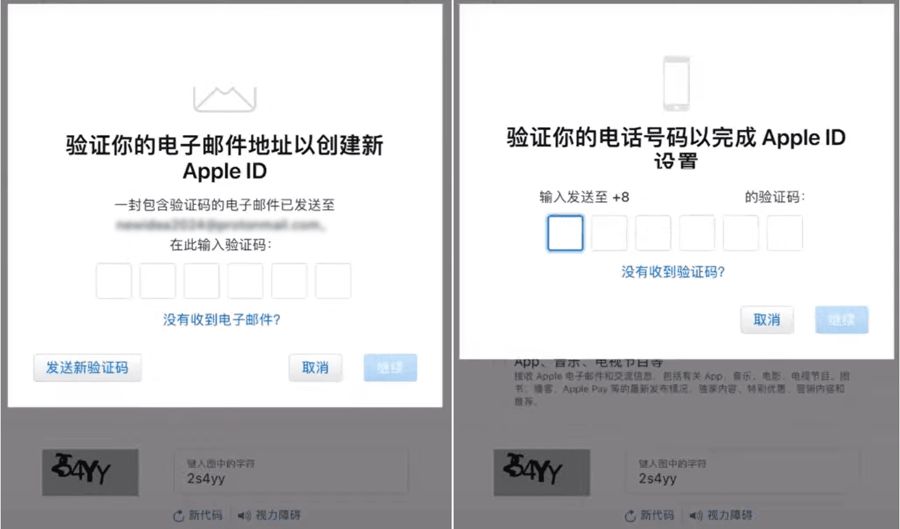
Verify your email and phone as prompted: open your 163 mailbox on the iPhone and enter the code from Apple’s email; then enter the text or voice code sent to your +86 number. Never share verification codes with anyone.
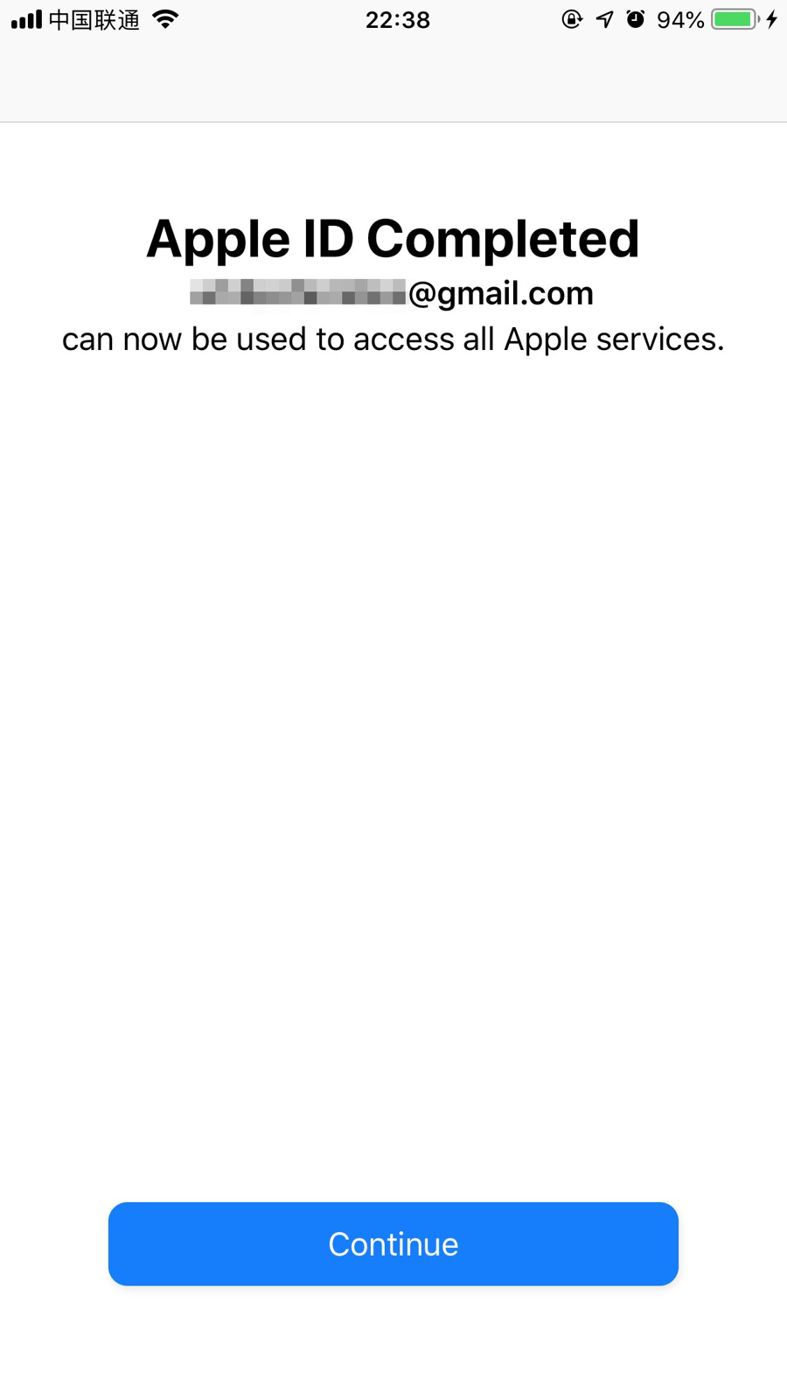
Once verified, return to the App Store as prompted and check your account status. If you see any account notices, go by what your iPhone currently shows, or contact Apple Support.
3. Things to Keep in Mind
We suggest using this account for App Store Media & Purchases; iCloud and the App Store are separate sign-in places. Keep your email, password and trusted phone number safe, and never share verification codes.
Downloading free apps doesn’t necessarily require a payment method; paid purchases or subscriptions need a payment method Apple accepts in that region. See Apple’s payment methods guide.
4. Common Issues
No “Create New Apple Account” option: Check that you have signed out of Media & Purchases in the App Store, and follow Apple’s official steps.
No verification code at your 163 email: Check your spam folder, the spelling of the address and whether the mailbox can receive mail.
No “None” payment option: This option doesn’t always appear. Follow what the page asks; if you can’t provide real, valid details, do not enter made-up information.
+86 verification fails: Double-check the country code and number and make sure it can receive text or voice codes; if it still fails, contact Apple Support.
5. Summary
Get a China-model iPhone, a working 163 email and your own +86 phone number ready, start the sign-up from the App Store on your iPhone, choose the US region and complete the details and verification as shown. A US IP is not a prerequisite in Apple’s official iPhone sign-up steps; payment and billing options depend on what Apple’s page actually shows.